Defining Specific DHCP Pools
Jul 20, 2016
With LEDE/OpenWRT you have the ability to have more specific control over your devices DHCP leases.
This guide will walk you through some of the fine tuning options you have.
SSH to your OpenWRT device
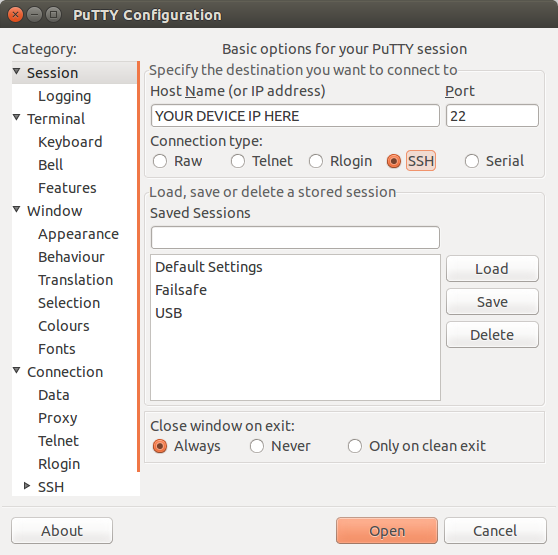
If you are using Windows then start PuTTY and click Session on the left side, select SSH from the options, and then enter in the IP Address of your OpenWRT box into the Host Name field.
Once you’ve done this just click on Open to start up the SSH connection.
If you are connecting via terminal, then just SSH to your OpenWRT device using the following command, where 192.168.1.1 is your OpenWRT device’s IP address.
Defining a DHCP Pool
All of the changes mentioned will be made in the following file unless otherwise specified, so run the following command:
vi /etc/config/dhcp
By default you should find a DHCP section defined for your device’s LAN that looks something similar to this:
config 'dhcp' 'lan'
  option 'interface'   'lan'
  option 'start'       '100'
  option 'limit'	     '150'
  option 'leasetime'   '24h'
  option ra server
  option dhcpv6 server
Some of the options listed in this example mean the following:
- interface: This defines the interface associated with this DHCP pool. In this example, the LAN.
- start: This defines the offset from interface network address that leases will start from. In this example, in a default configuration, addresses would start to be leased from 192.168.100
- limit: This defines the size of the DHCP pool (the max number of addresses). This means that in this example, the highest address that can be issued is 192.168.250.
- leasetime: This defines the life of a lease, before it will need to be renewed. In this example it is 24 hours.
If you do not find any entries similar to the above, or you wish to create your own pools you can simply copy the structure above.
You can create a specific DHCP pool for each interface you have defined.
If you find a defined pool that you do not want to be acted upon (but do not want to completely delete the section from your config) you can simply add the following line into the block:
option ignore 1
This will tell dnsmasq to ignore this pool.
CT WiFi is a cloud based WiFi management platform for businesses. The firmware gives consumer-grade WiFi access points enterprise-like capabilities. Or you can utilise the captive portal solution with your existing infrastructure. Create a free account and check it here ct-networks.io