Setting Up Tor
Aug 3, 2016
This guide will run you through the steps needed to get Tor working with your LEDE/OpenWRT device to help protect your personal privacy on the internet.
SSH to your OpenWRT device
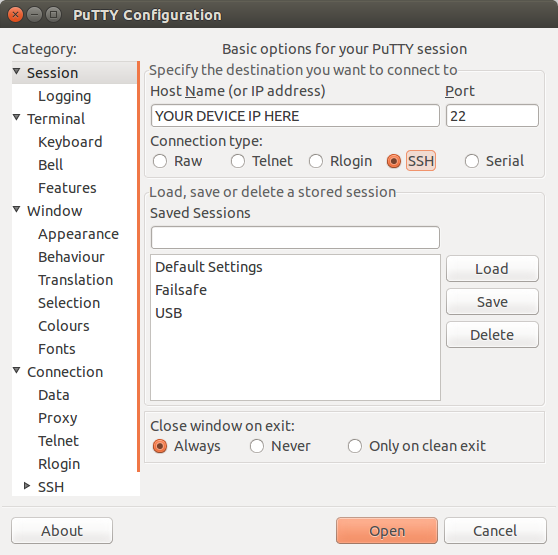
If you are using Windows then start PuTTY and click Session on the left side, select SSH from the options, and then enter in the IP Address of your OpenWRT box into the Host Name field.
Once you’ve done this just click on Open to start up the SSH connection.
If you are connecting via terminal, then just SSH to your OpenWRT device using the following command, where 192.168.1.1 is your OpenWRT device’s IP address.
Network Configuration
To start off we want to get your device set up and running all the correct network and firewall rules in preparation for configuring Tor.
First off we need to define a new network interface, so run the following command:
vi /etc/config/network
Now we will need to add in something similar to the following:
config interface ‘wifi’
option proto ‘static’
option ipaddr ‘192.168.10.1’
option netmask ‘255.255.255.0’
Next we need to define this interface’s DHCP pool, so run the following:
vi /etc/config/dhcp
And then add in the following:
config dhcp ‘wifi’
option interface ‘wifi’
option start ‘100’
option limit ‘150’
option leasetime ‘12h’
Now we need to create a new firewall zone so we can configure the specific rules needed. Run the following command:
vi /etc/config/firewall Then add in the following:

config zone
option name ‘wifi’
option input ‘ACCEPT’
option output ‘ACCEPT’
option forward ‘REJECT’
option network ‘wifi’
config forwarding
option src ‘wifi’
option dest ‘wan’
config forwarding
option src ‘wan’
option dest ‘wifi’
After that, we need to define the wireless, so run the following:
vi /etc/config/wireless
And add in the following, making sure to tweak the necessary fields to match your setup.
config wifi-device ‘radio0’
option type ‘mac80211’
option hwmode ‘11g’
option path ‘platform/ar933x_wmac’
option htmode ‘HT20’
option channel ‘1’
option country ‘IN’
option txpower ‘20’
config wifi-iface
option device ‘radio0’
option ssid ‘My Awesome WiFi’
option mode ‘ap’
option network ‘wifi’
option disabled ‘0’
option encryption ‘psk2’
option key ‘SuperSecretPassword’
Finally run the following commands to restart all the necessary processes:
ifup wifi
/etc/init.d/dnsmasq restart
/etc/init.d/network restart
Firewall Rules
We are going to add the firewall rules into the firewall user file, so run the following command:
vi /etc/firewall.user
Then add in the following lines:
tor_rules() {
iptables -t nat -A PREROUTING -i wlan0 -p tcp — dport 22 -j REDIRECT — to-ports 22
iptables -t nat -A PREROUTING -i wlan0 -p tcp — dport 9050 -j REDIRECT — to-ports 9050
iptables -t nat -A PREROUTING -i wlan0 -p udp — dport 53 -j REDIRECT — to-ports 9053
iptables -t nat -A PREROUTING -i wlan0 -p tcp — syn -j REDIRECT — to-ports 9040
}
tor_rules
Finally restart the firewall to apply your changes:
/etc/init.d/firewall restart
Configuring Tor
Now that the LEDE/OpenWRT network settings have been configured correctly, we can install and configure Tor.
To install Tor, run the following commands:
opkg update
opkg install tor tor-geoip
Now we just need to edit the Tor config file, so run the following:
vi /etc/tor/torrc
And add in the following, making sure to tweak the necessary fields for your setup:
DataDirectory /var/lib/tor
AllowUnverifiedNodes middle,rendezvous
VirtualAddrNetworkIPv4 10.192.0.0/11
AutomapHostsSuffixes .onion,.exit
AutomapHostsOnResolve 1
TransPort 9040
TransListenAddress 192.168.10.1
DNSPort 9053
DNSListenAddress 192.168.10.1
SocksPort 9050
SocksBindAddress 192.168.10.1:9050
SocksBindAddress 192.168.10.1:9050
Finally, to confirm whether you have set everything up correctly and working, connect to the new network and navigate to the following site in a browser: https://check.torproject.org/
If you have configured everything correctly, you should get a success message displayed. Enjoy your newfound privacy on the internet!
CT WiFi is a cloud based WiFi management platform for businesses. The firmware gives consumer-grade WiFi access points enterprise-like capabilities. Or you can utilise the captive portal solution with your existing infrastructure. Create a free account and check it here ct-networks.io