Setting up a splash page for a Meraki network
Jul 30, 2015
This doc is outdated. Please view our new documents here:
docs.ct-networks.io
In order to use Meraki with the CT WiFi logins and radius, you’ll need to make some changes in your Meraki portal.
On the left hand menu bar, click on Wireless and select Access Control.

Under Splash Page, you’ll need to select the Sign-on with option. In the drop down, select my RADIUS server.
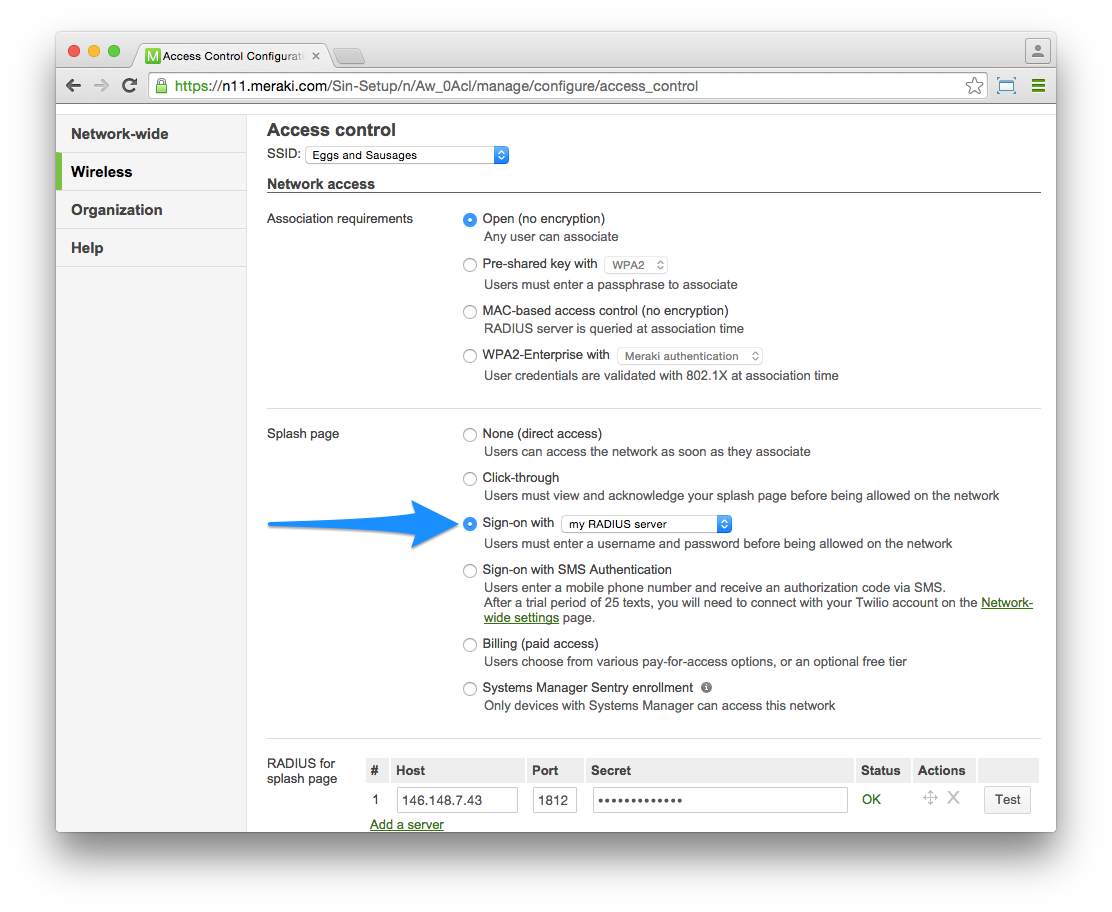
Scroll down and look for RADIUS for splash page. Click on Add a server and enter the following details in the necessary fields:
- Host: 146.148.7.43
- Port: 1812
- Secret: LocIAeonShieSEpodE57
You should have an option underneath that shows RADIUS accounting. Make sure the option in the field is on RADIUS accounting is enabled.
!! IMPORTANT !! If you don’t, please contact Meraki support to ask them to enable this option for you
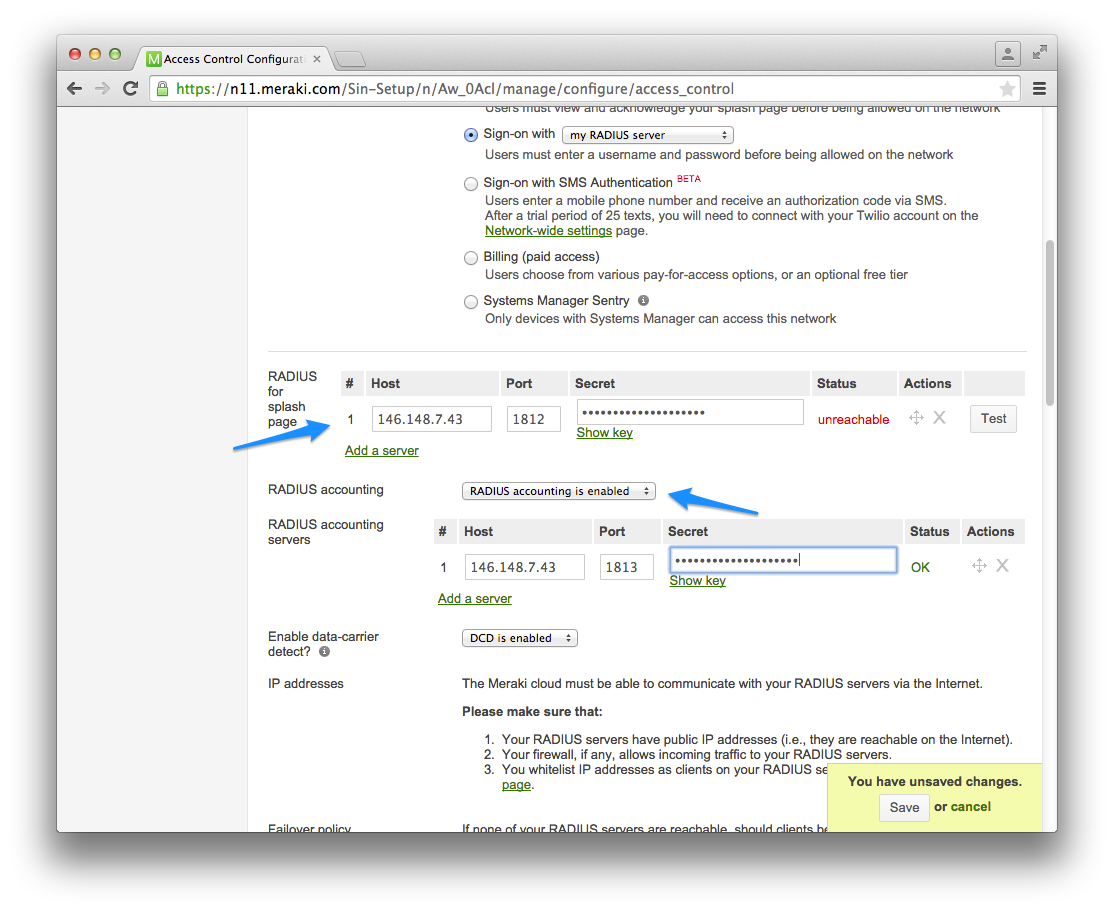
Now change the accounting servers to the following:
- Host: 146.148.7.43
- Port: 1813
- Secret: LocIAeonShieSEpodE57
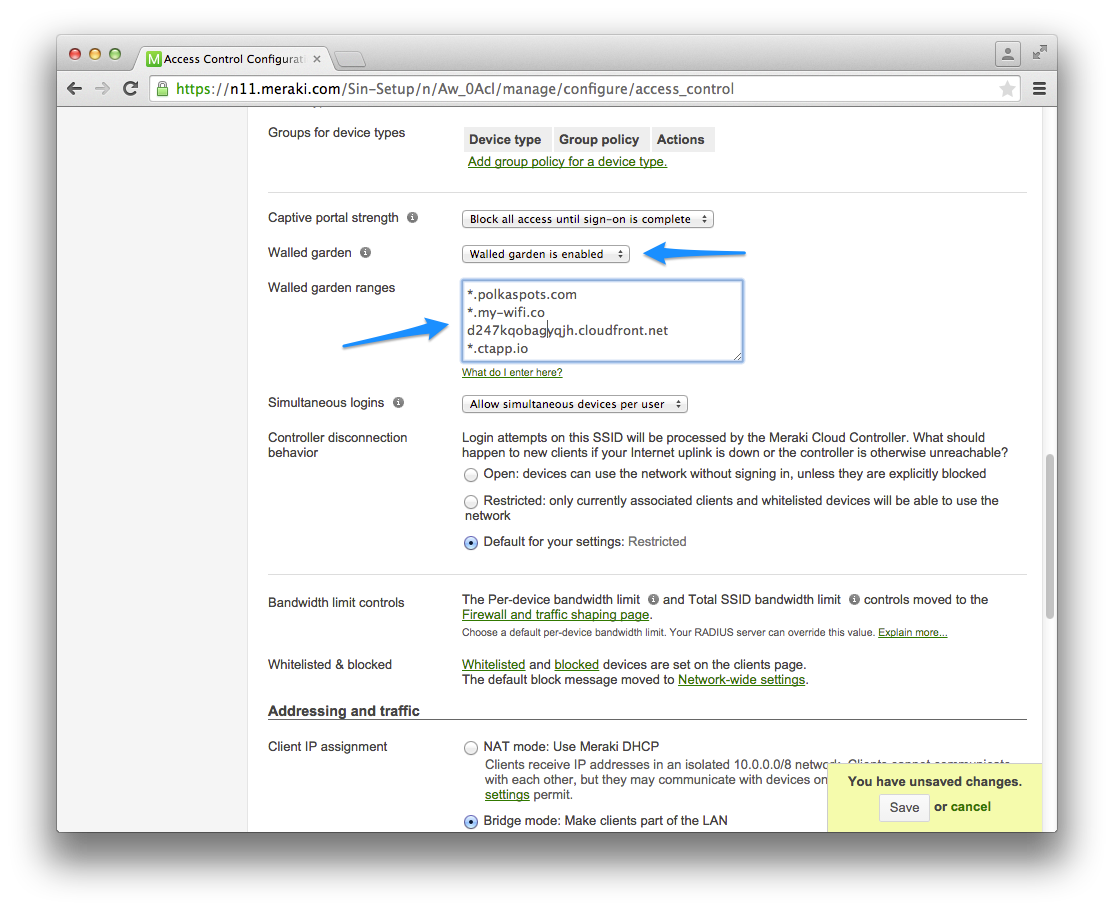
Scroll further down and look for Walled Garden. Make sure Walled garden is enabled and add the Walled Garden entries to the Walled garden ranges.
You can find the most up to date list of Walled Gardens here.
If you have errors when copying these in, try typing them out manually.
!! IMPORTANT !! Click Save at the bottom right yellow pop up to ensure all your changes have been made.
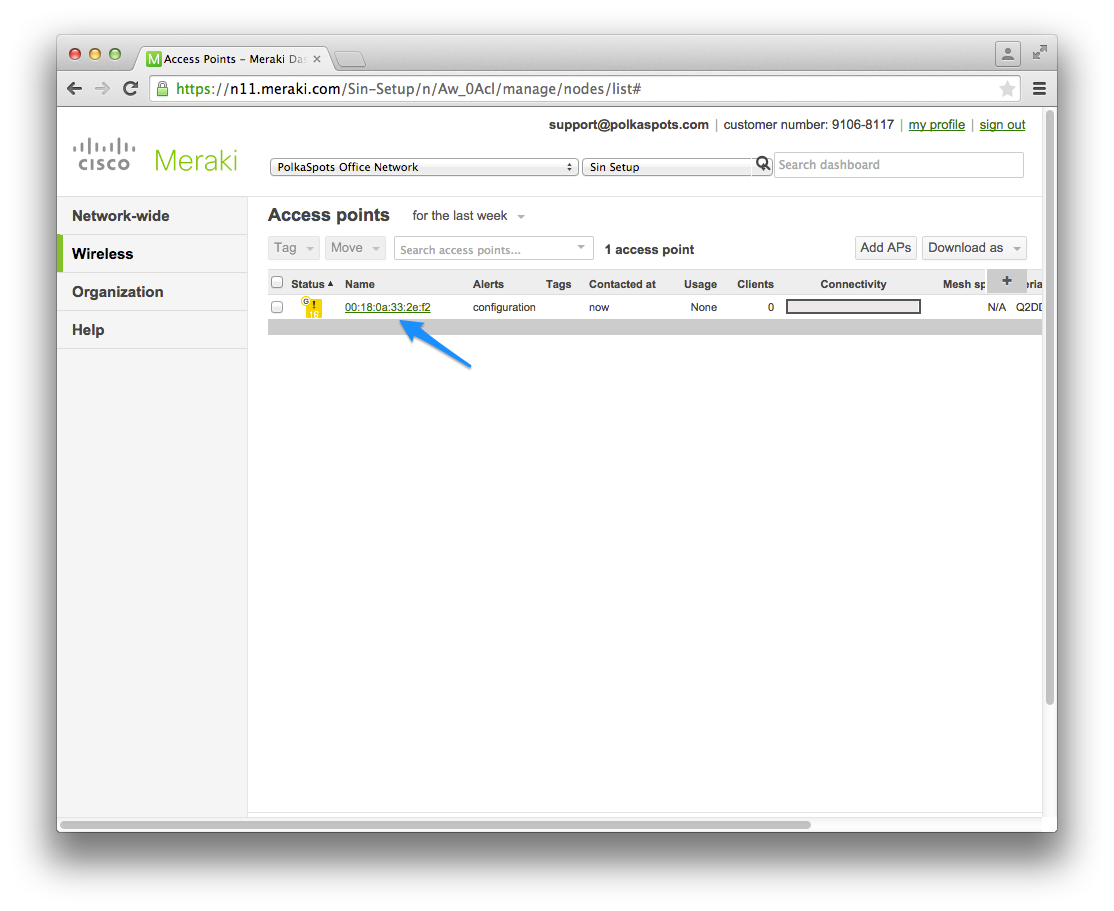
Now you’ll need to add your Meraki Box into your CT WiFi dashboard.
You’ll need the MAC address for this. To find this, click on the Wireless tab on the left hand side and select Access Points.
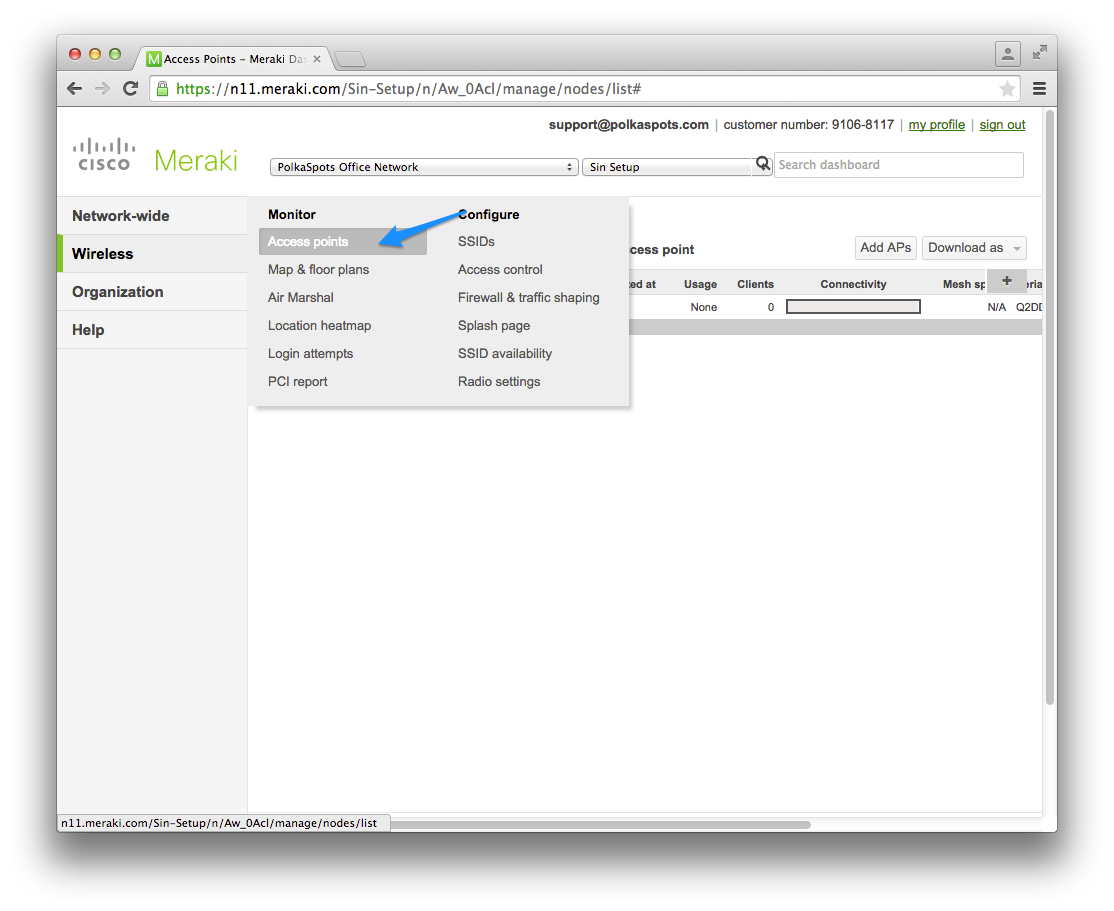
The MAC address of your box will show here.
Now go to your CT WiFi account and if you haven’t already, create a location to add your boxes to.
Once a location has been created, select your location and click on Boxes in the left side menu. Add your Meraki box by clicking on Add box.
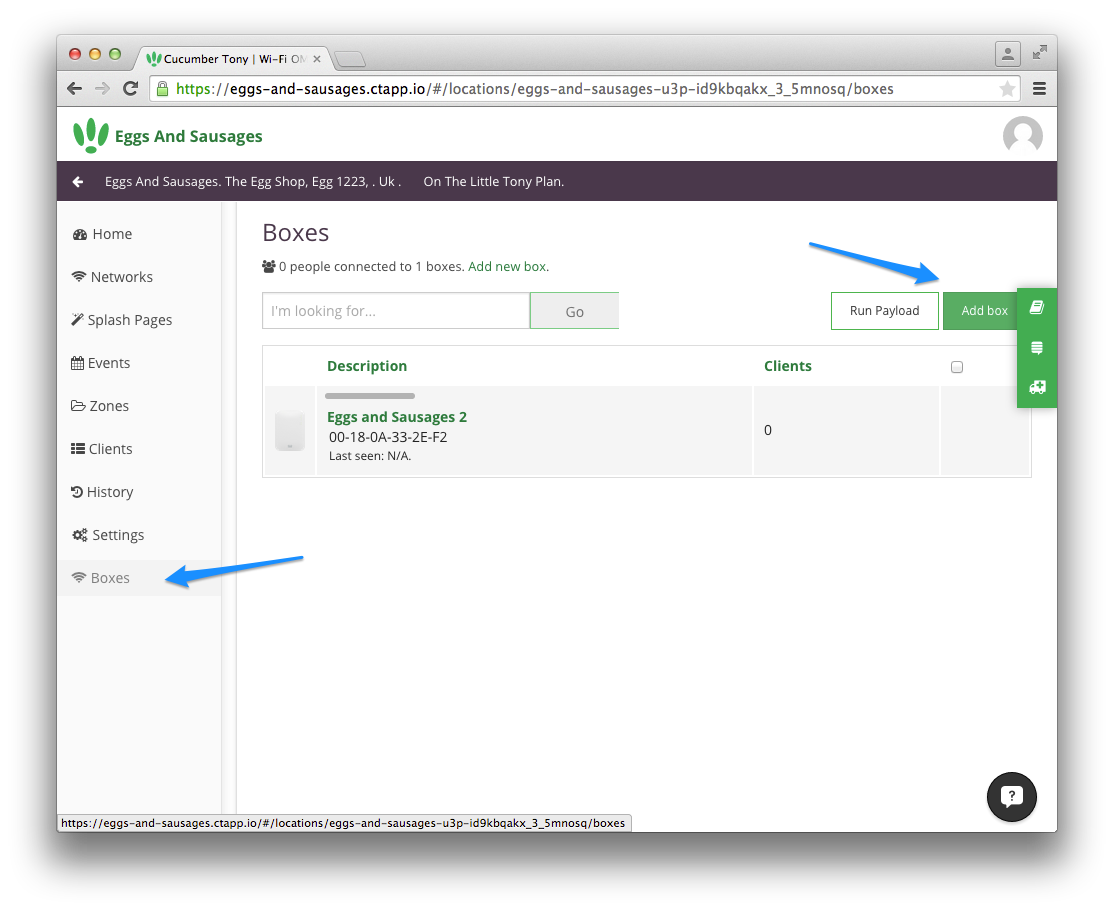
Select I have a Meraki, Ruckus or another device and add the MAC address you got from the Meraki Dashboard previously and click Save.

Finally you’ll need to change your splash page to use a custom url.
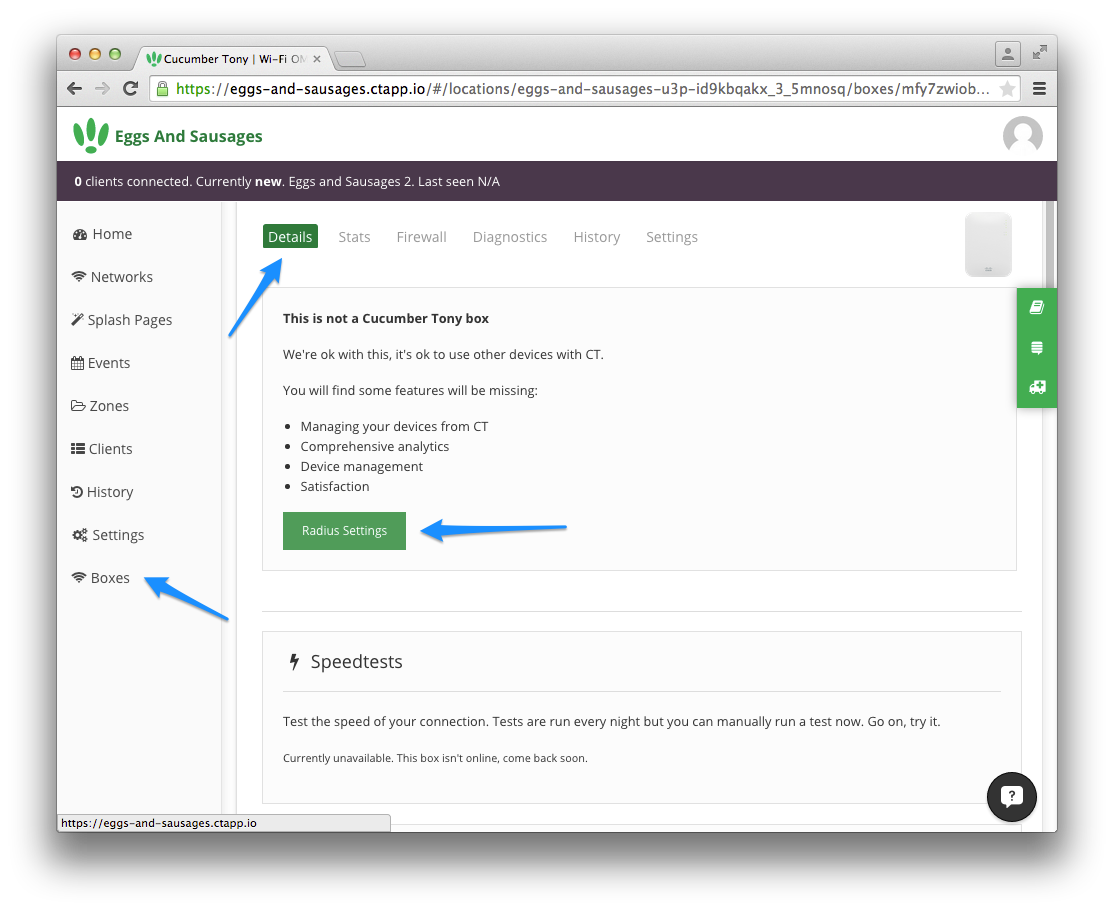
Head to your Box’s page and click on the box you’ve just added. If you don’t immediately see a large green button called Radius Settings, you’ll need to make a few changes by clicking on Settings.
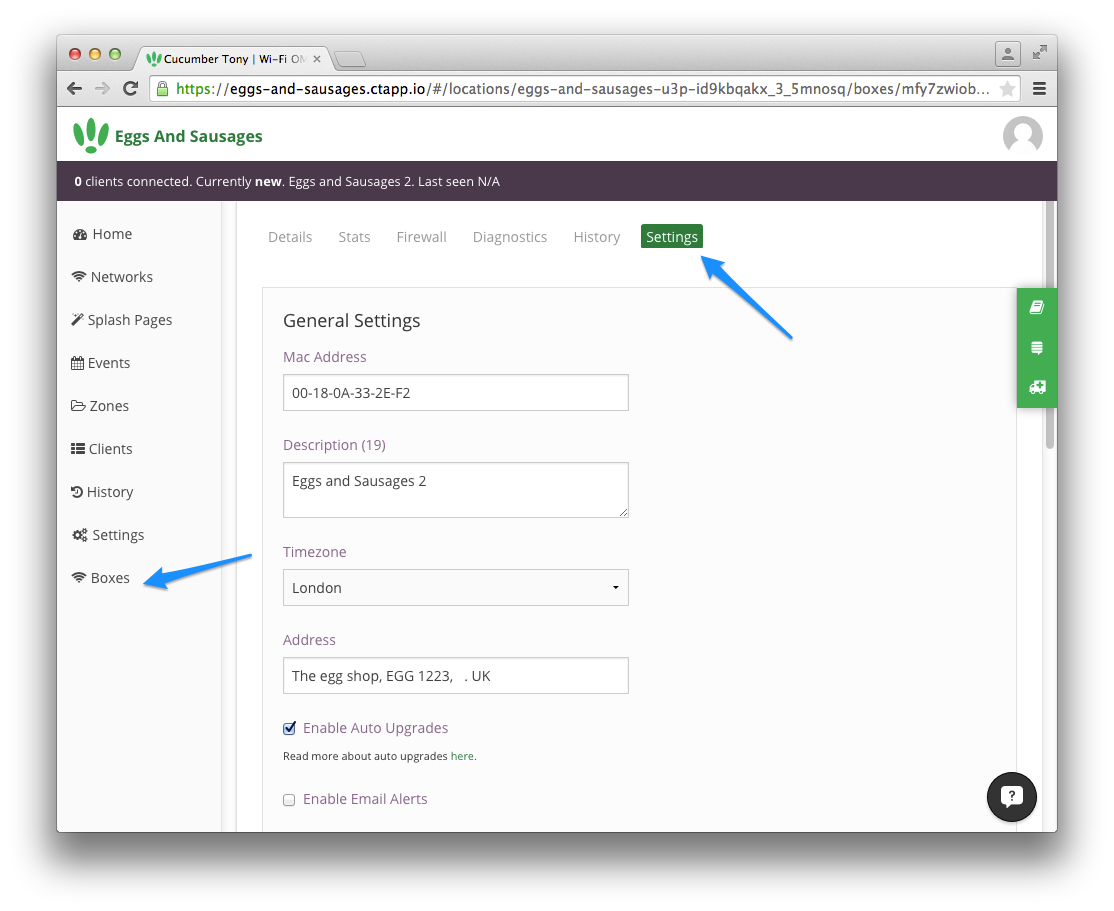
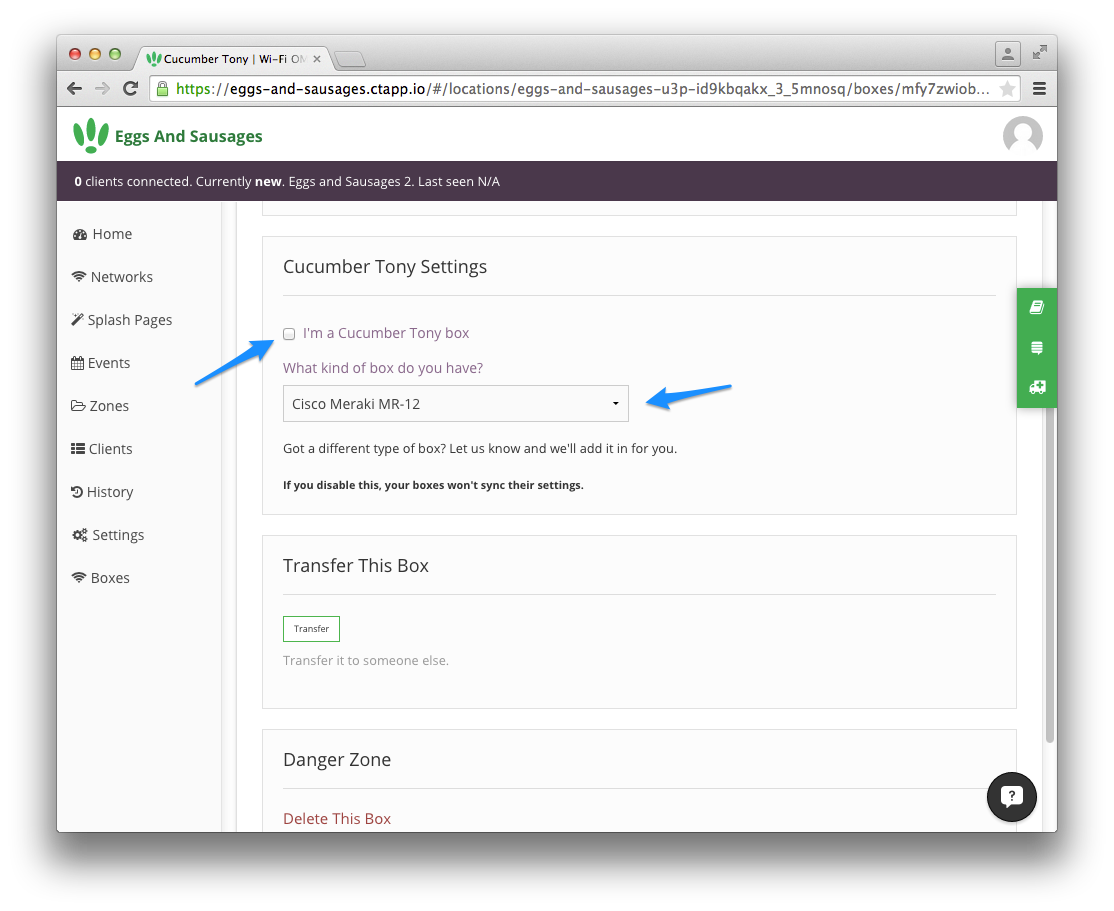
Scroll down to CT WiFi Settings and uncheck I’m a CT box and select your Meraki box type under What kind of box do you have. Scroll to the bottom of the page and click Update.
Now go back to the Details tab in Boxes and you’ll see the large green button - Radius Settings.
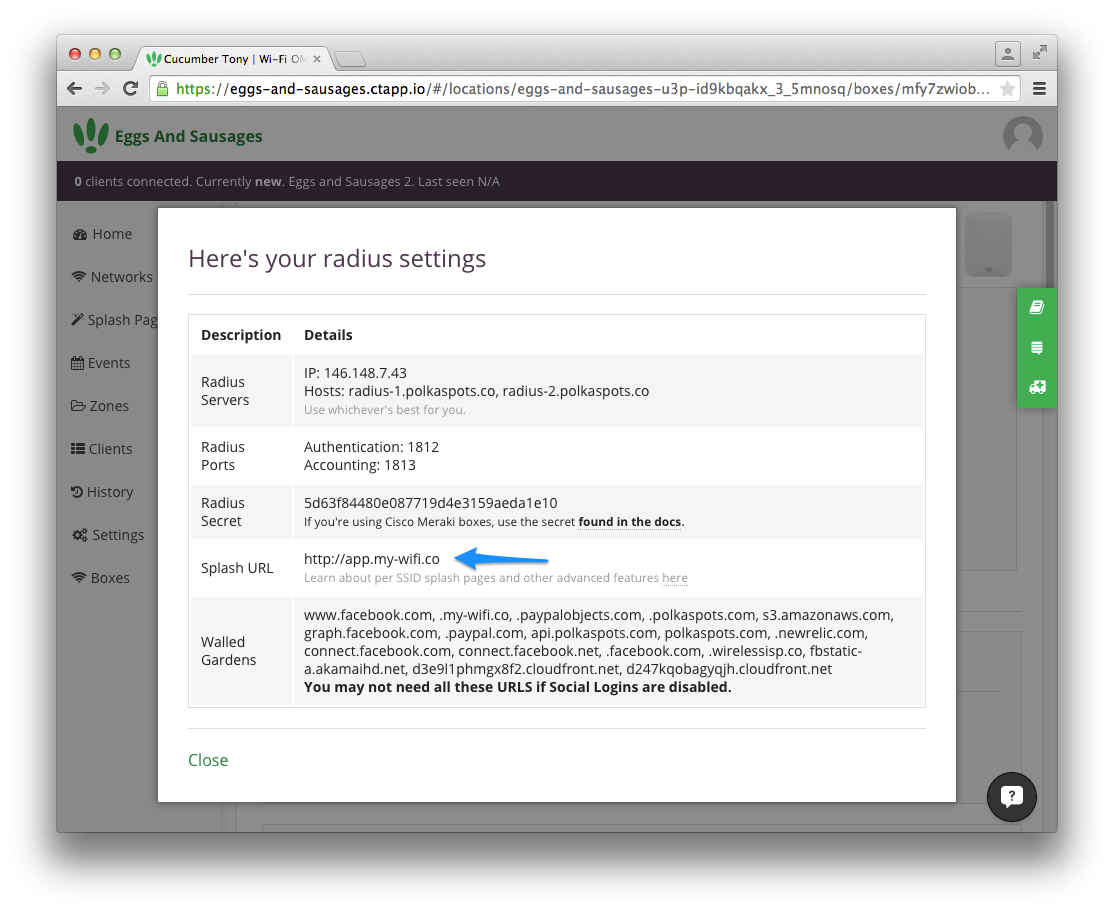
You’ll be shown a page with all the radius settings information needed. Copy the Splash URL - http://app.my-wifi.co
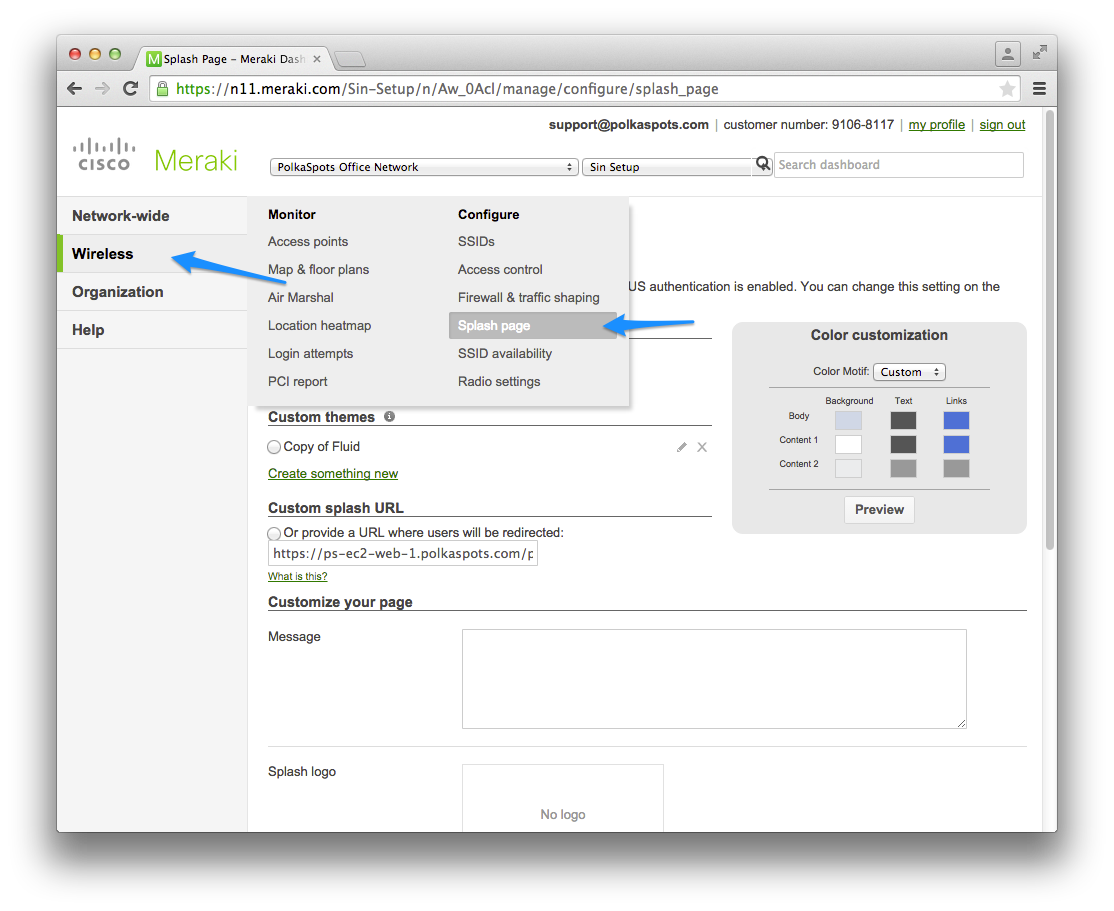
Now, head back over to your Meraki Dashboard, and click on Wireless again and select Splash page.
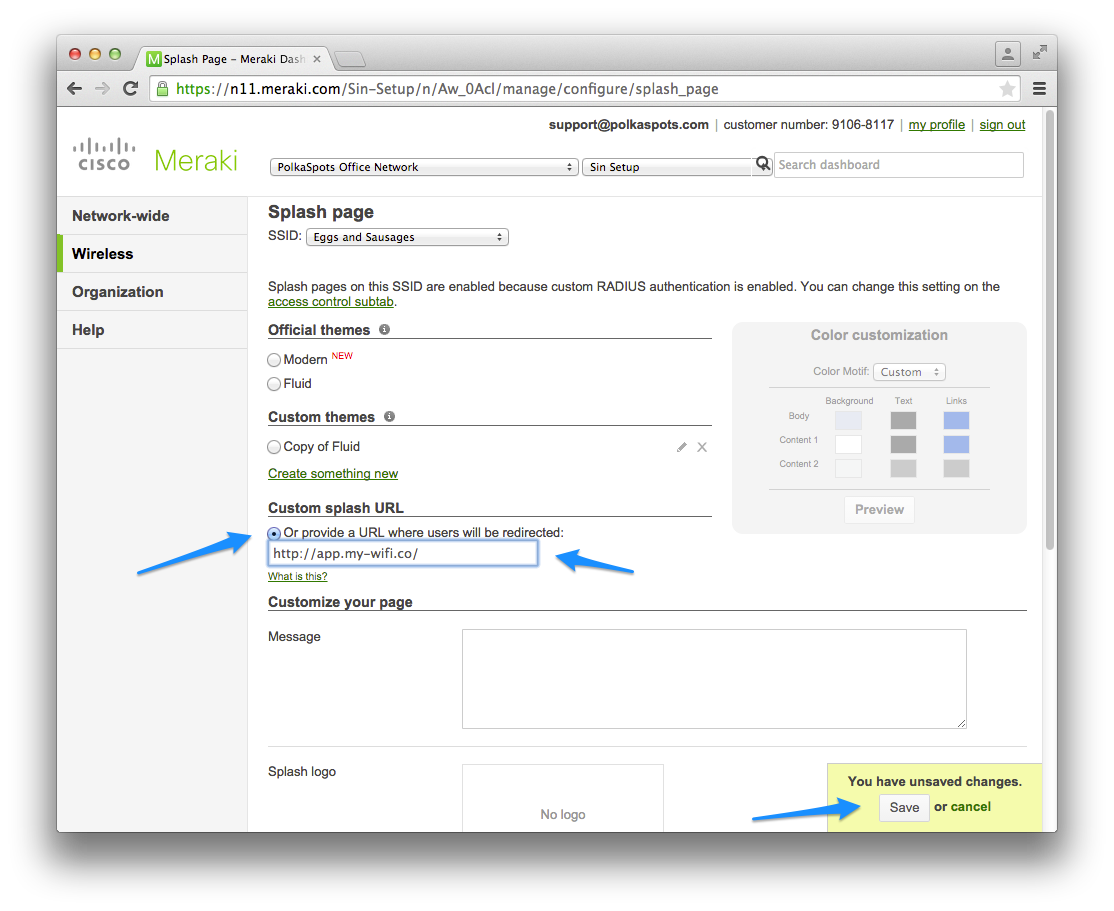
Now select Custom Splash URL - Or provide a URL where users will be redirected and paste the above URL (http://app.my-wifi.co). This step is necessary for both single splash page or the multiple splash page URL. Then click Save.
Note: If you have tagged logins enabled, this will take priority over the URL provided.
Your SSID should now show in your networks. Select the SSID in your networks to test this.
!! IMPORTANT !! The SSID of your network will be the one you’ve set in Meraki not the one set in CT WiFi. This feature is not available for Meraki boxes. You can rename or edit these under your Meraki SSID settings.
For multiple SSID’s, enable the SSID’s you want in your Meraki SSID settings, then return to Splash Page settings in Meraki and apply the same method as shown below.
IMPORTANT MESSAGE
You may get alerts from Meraki about the servers being unreachable. If this happens, then you will need to retreive a set of IP addreses from your dashboard and email them in to us.
Under Access Control, on the middle of the page get the following IP addresses and send them to [email protected] in order to add them in.
It will look like the following:

Secondly, you may need to ask Meraki a few things:
- To enable hostnames in the list of allowed walled gardens
- To enable radius accounting otherwise you get zero data