How to setup a custom registration form
Sep 28, 2015
This doc is outdated. Please view our new documents here:
docs.ct-networks.io
If you want to capture customer data, it’s simple with CT WiFi. It’s simple, here’s how it works:
-
The first time your customers try and get online, they’ll see your registration form on the login page.
-
After filling in the details, they will be logged in.
-
The next time they arrive, they won’t have to register again.
If you have selected “Require Registration”, they will need to enter a username and password when signing up. If you don’t select this, when they arrive again, they will just see a clickthrough login.
Step 1. Create a Splash Page
In your Cucumber dashboard, create a new splash page (you can use an existing one if you want).
Make sure you’ve set the access type to ‘Registration’. Click the Edit Form button.
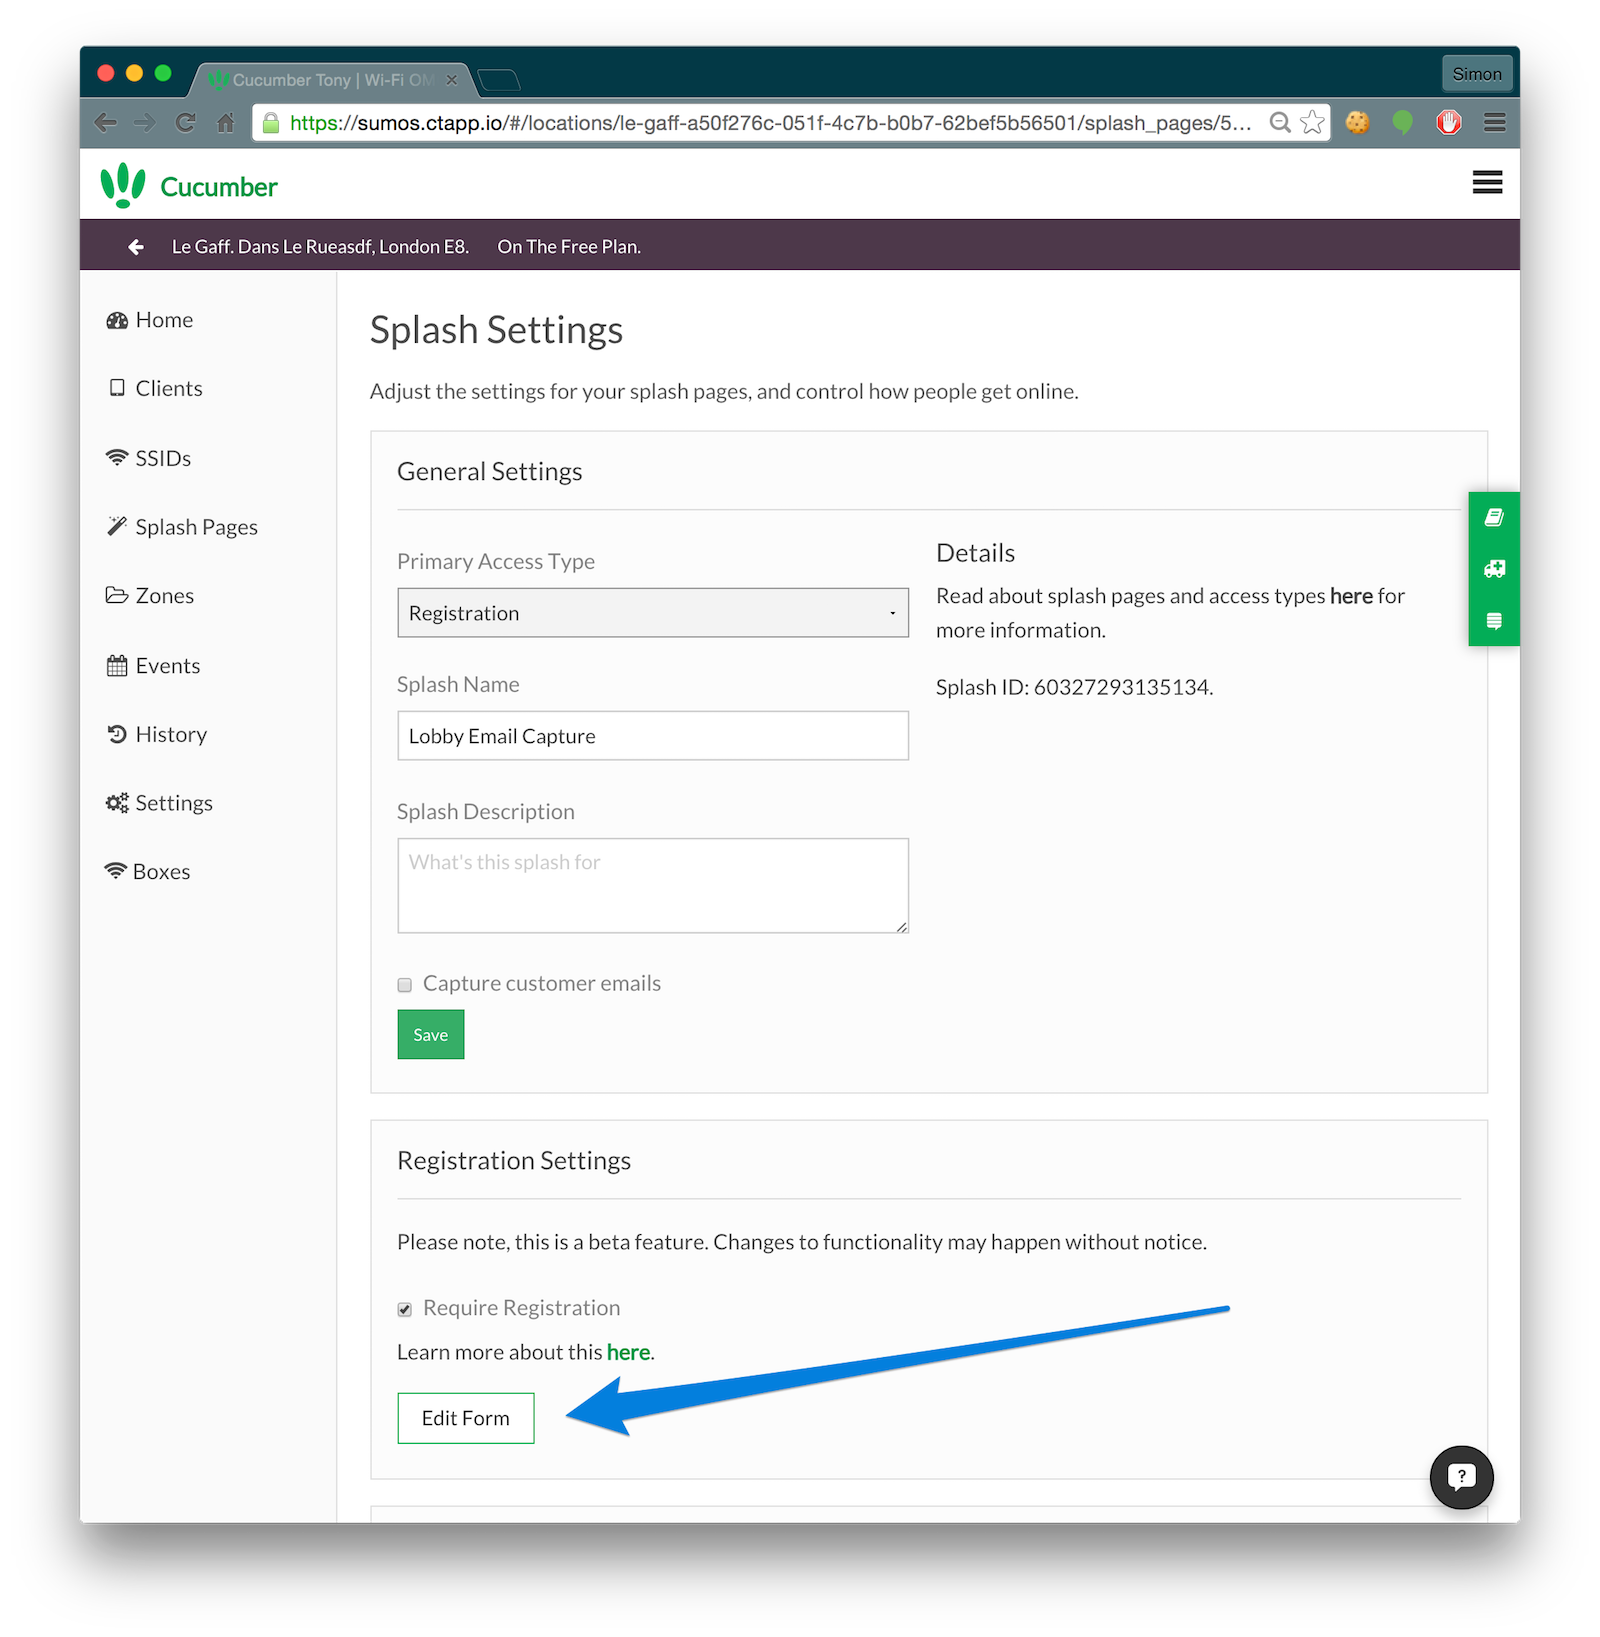
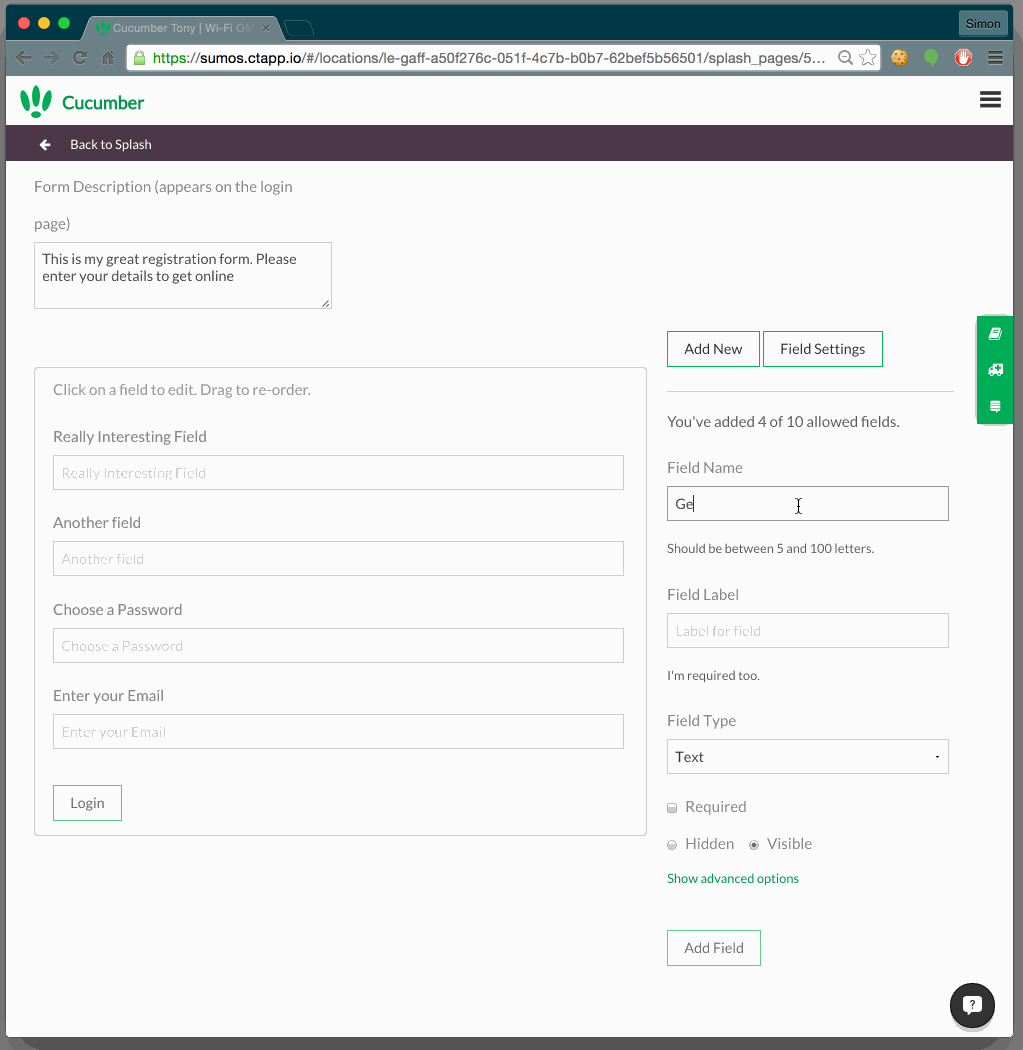
You should see a screen similar to this:
Enter a description for the form. This will appear on the login page.
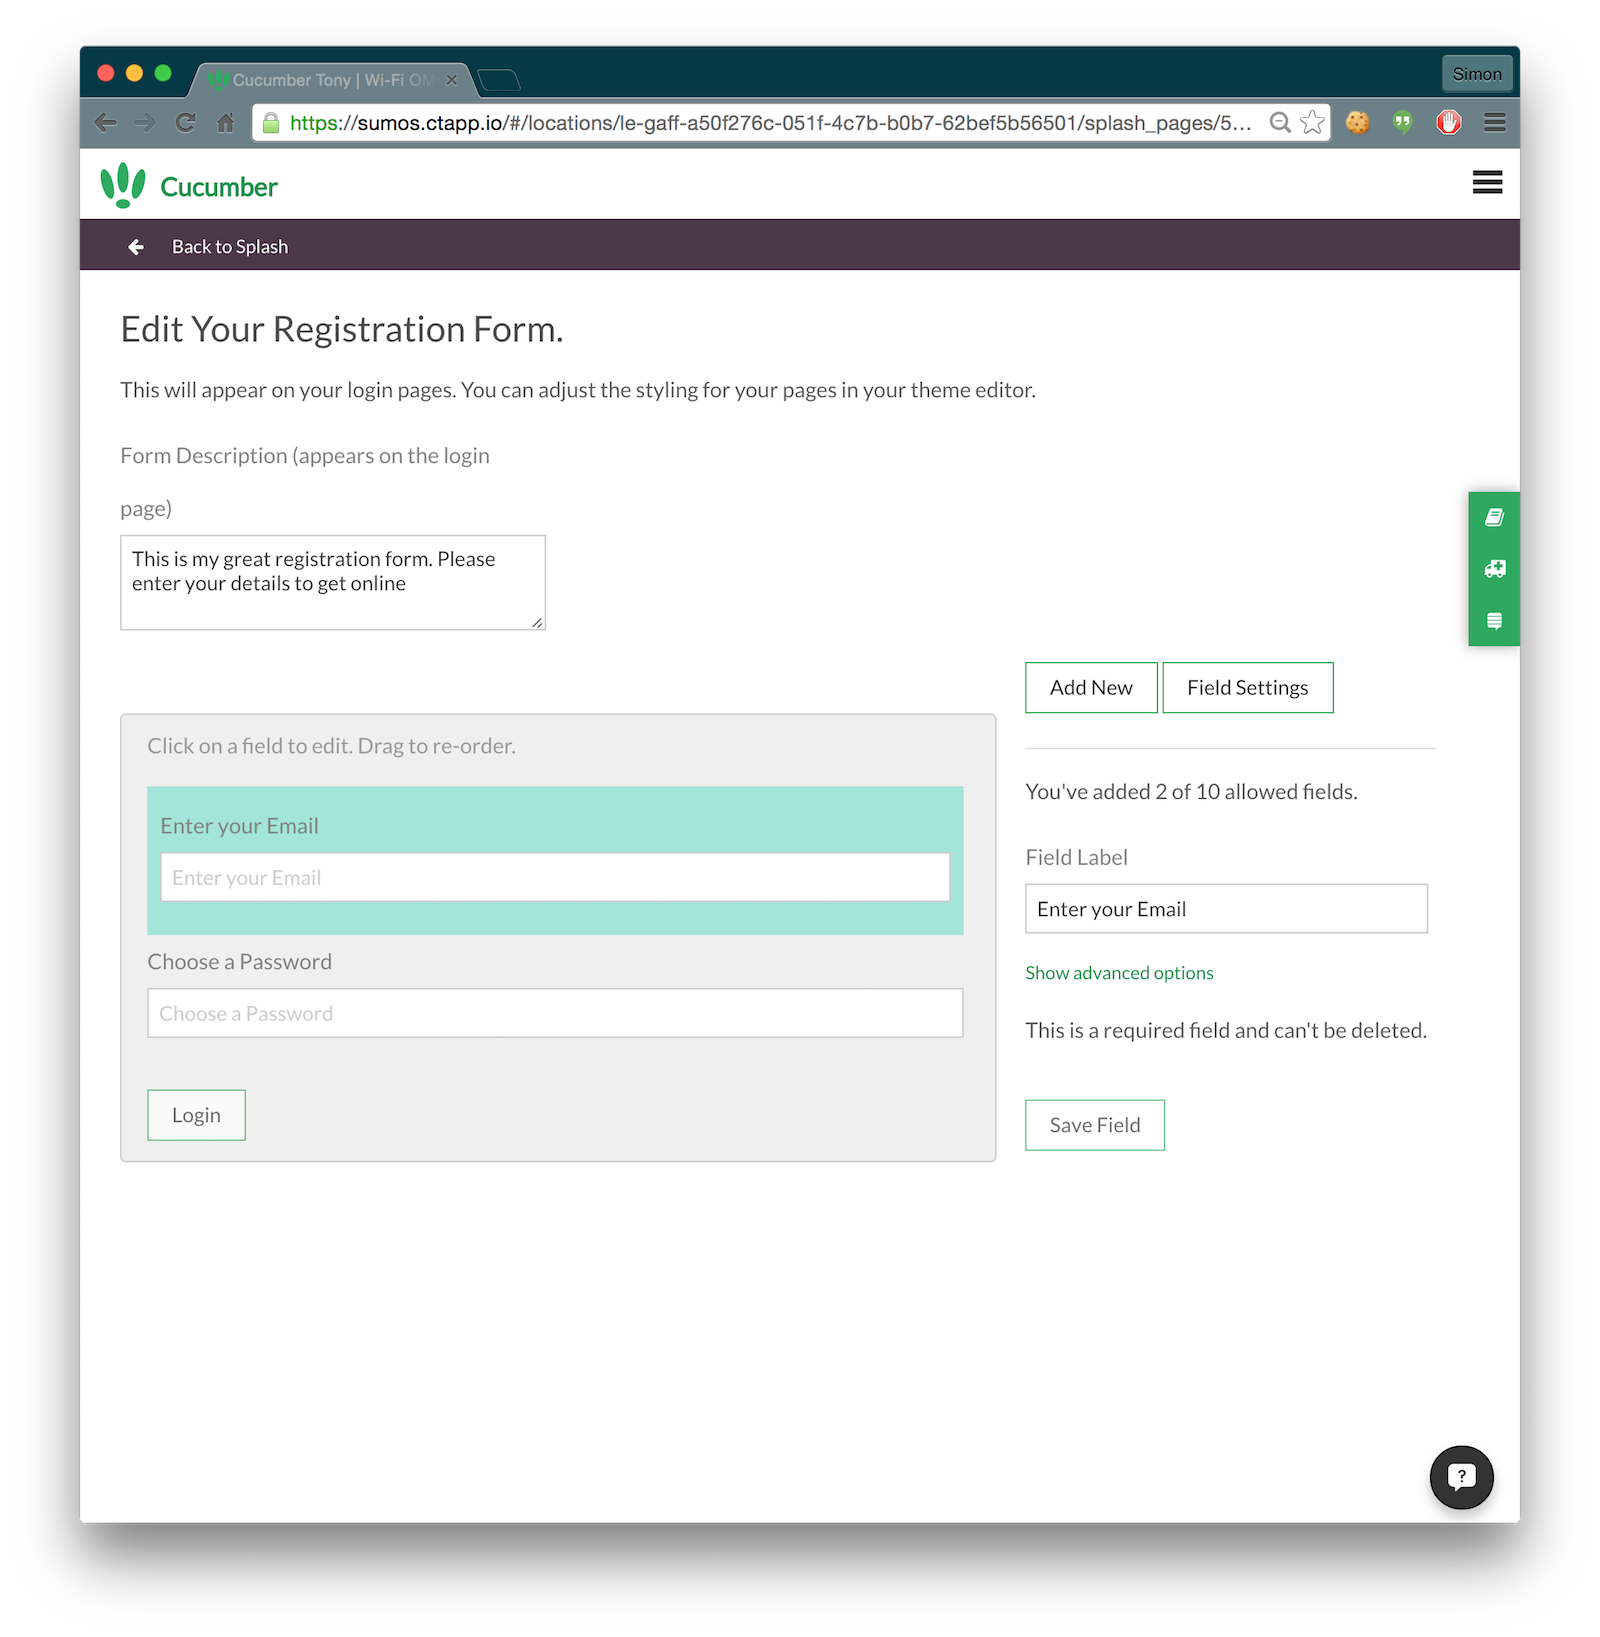
Step 2. Add Your Fields
Let’s create a country field. To do this, click the ‘Add New’ button on the right.
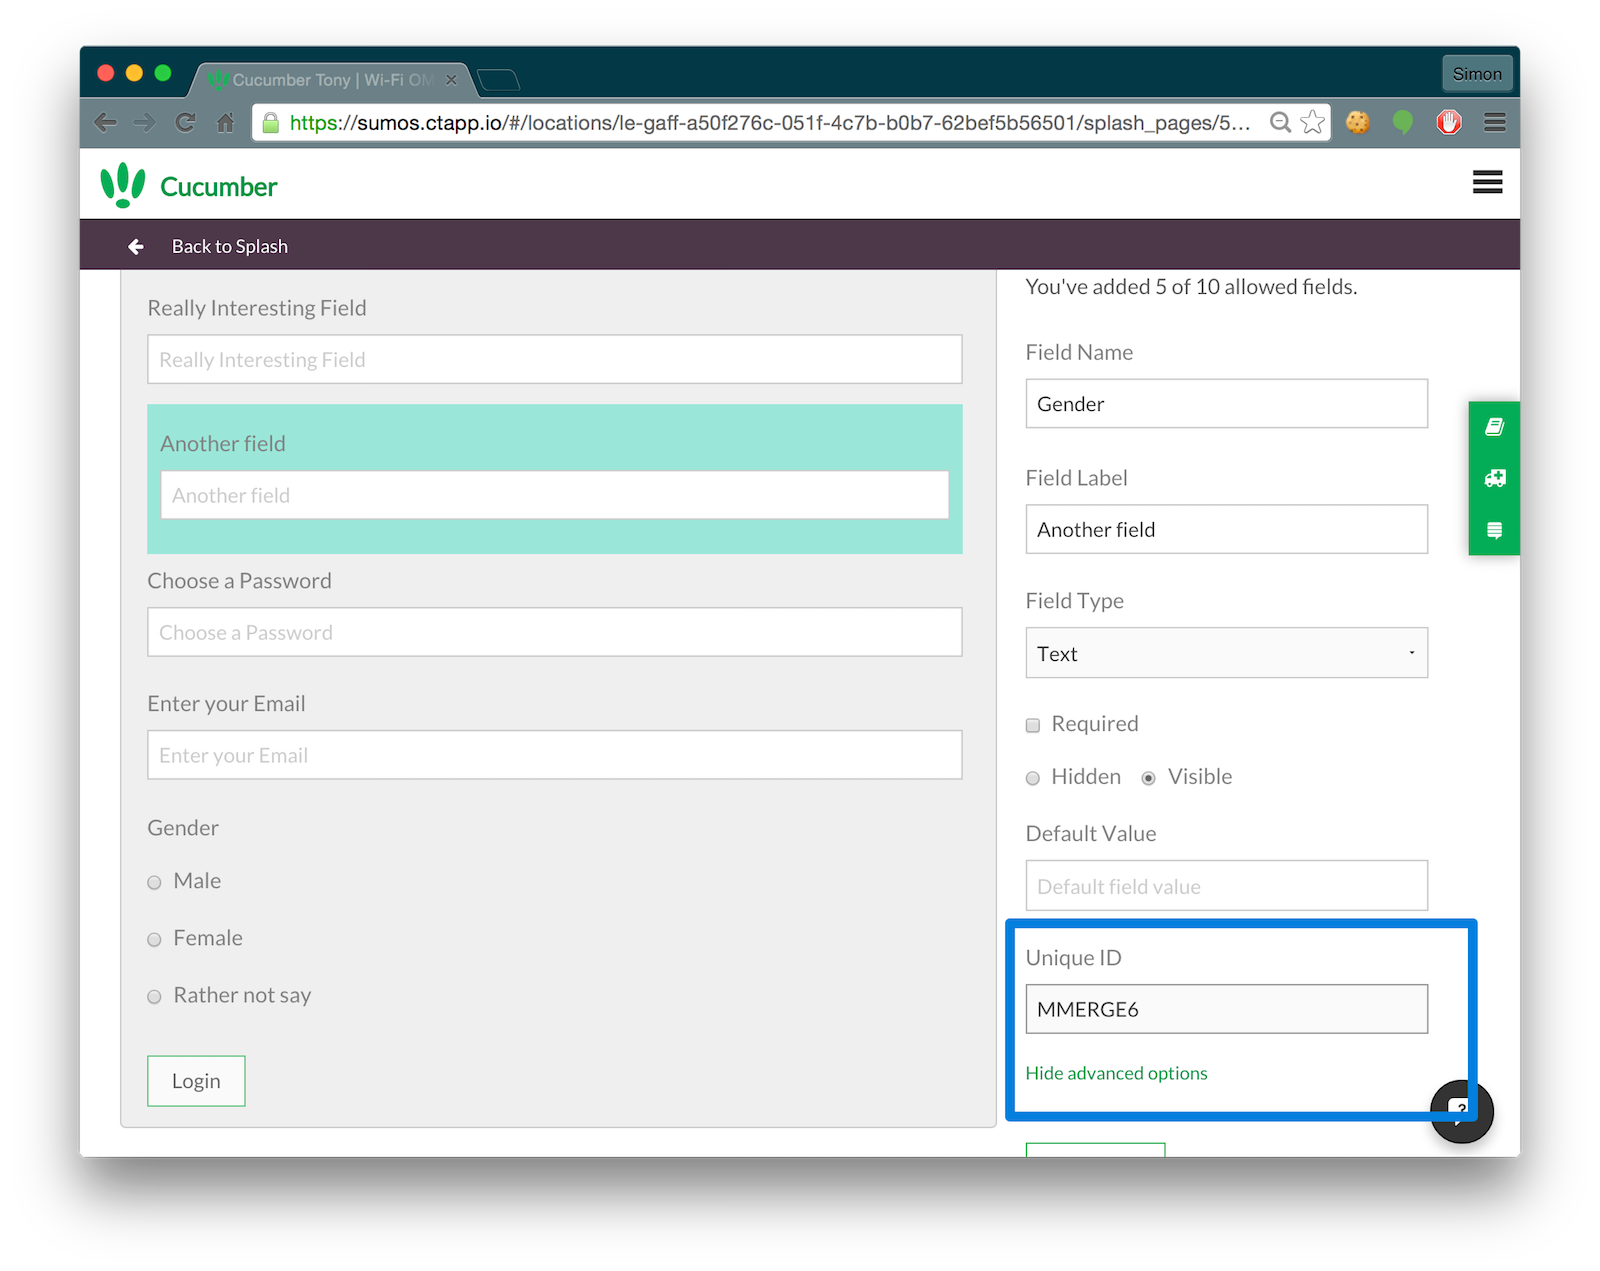
The options can be confusing to start with, we’ll tell you what they mean here.
- Field Name: this defines what it's called when you view your data. Make it descriptive, like 'gender' or 'country'.
- Field Label: the label for the field and will appear on the logins. You can type 'hidden' here and it won't appear.
- Field Type: the type of field, usually this will be text box.
- Required: if you select this, your customers will have to enter something before they can login.
- Hidden: Maybe you want to send a hidden variable with the request, for example an ID for your hotspot.
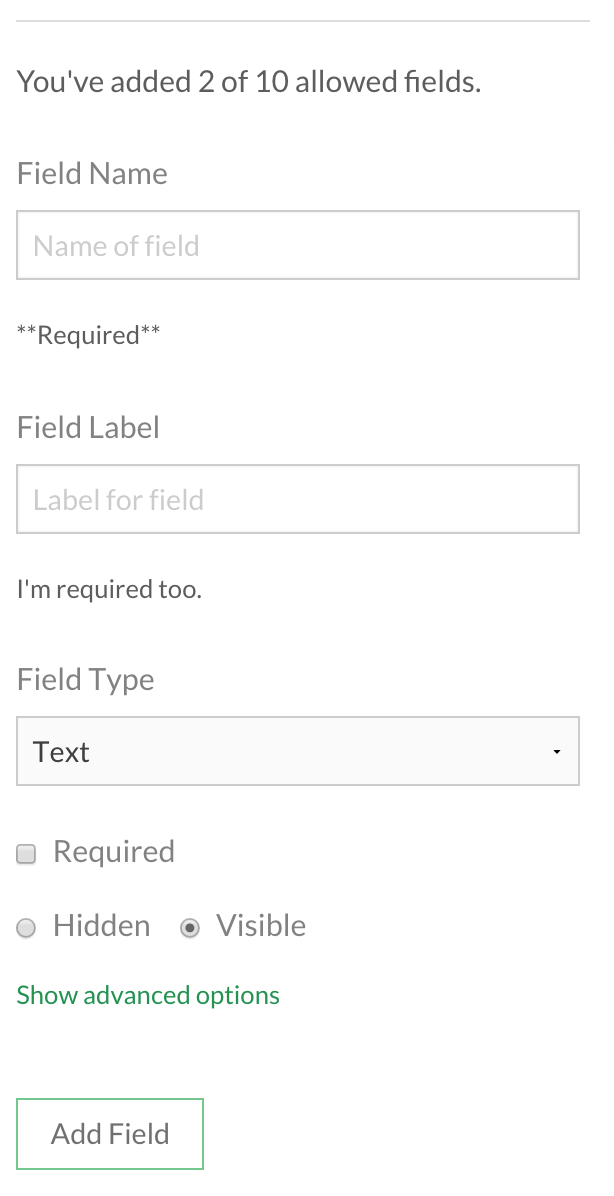
If you click the advanced button, there's even more stuff.
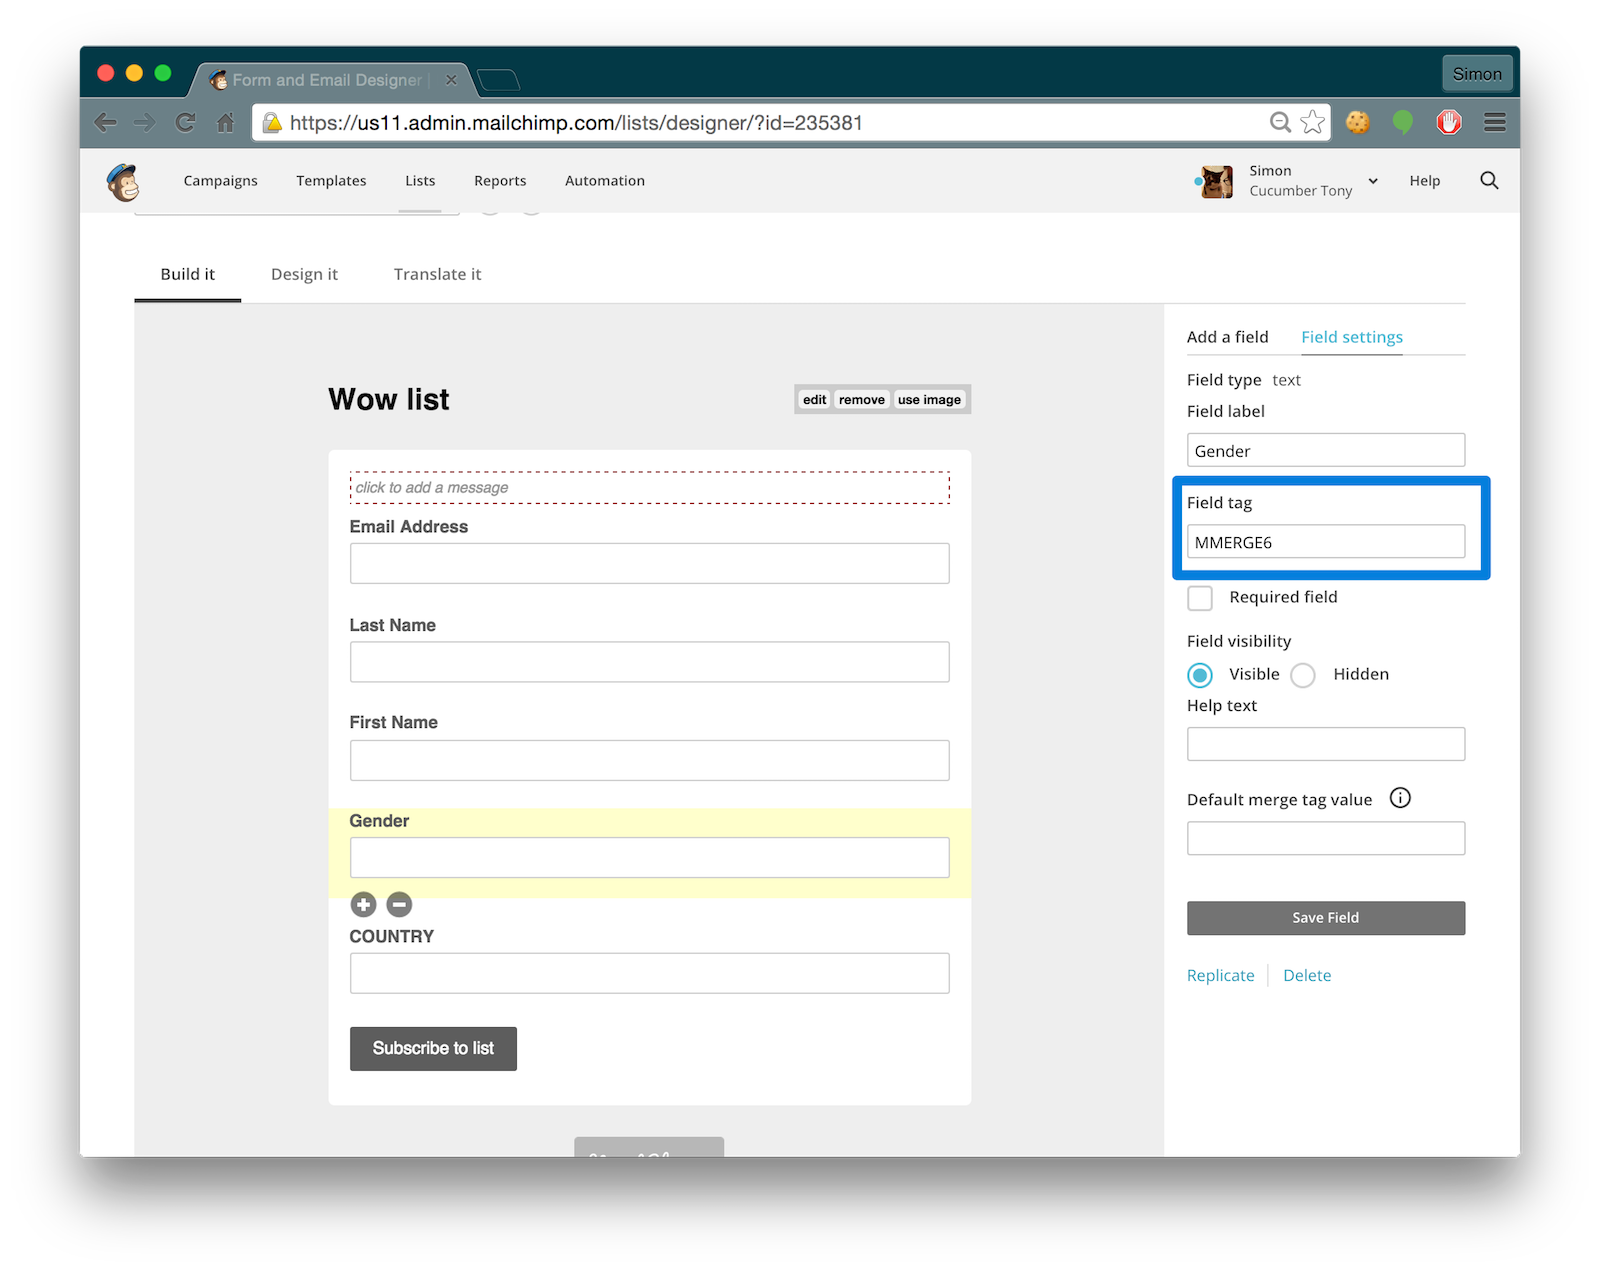
- Unique ID: if you're on a paid account, you can sync your form with your MailChimp forms too. Enter your MailChimp merge name in here. For example, MMERGE4.
- Value: you might want a default value for the field, particularly if you're using a hidden field.
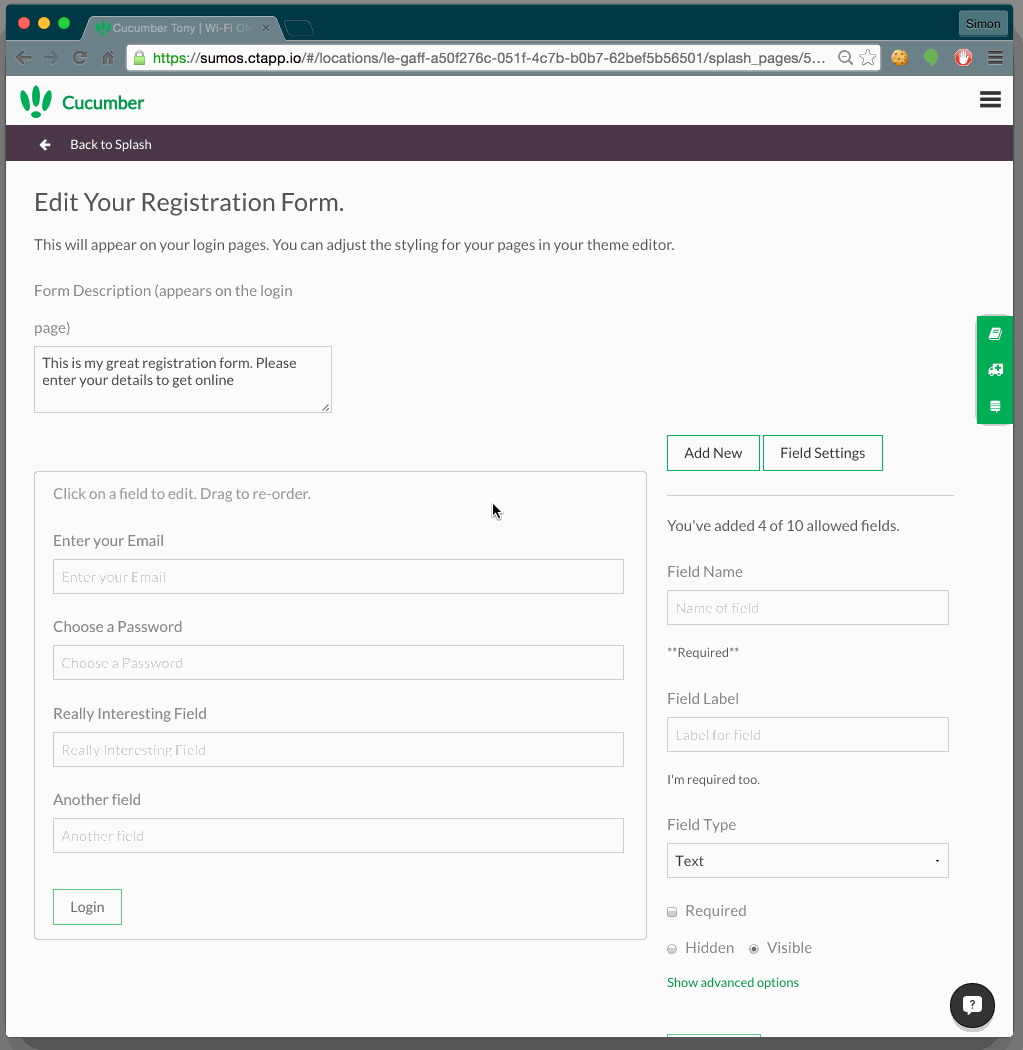
Changing the order
To change the order of the fields, simply drap them around!
Creating Radio Buttons
If you want some multiple-choice questions, you can use a checkbox but you’re better off with radio buttons. Set them up like this, it’s a blast!
Getting your Data
Once your customers have started signing-up, their data will appear in the guests report.
The default view shows all your records. If you want to see your custom fields, you can switch the splash page in the drop down menu.
In the guest’s page, you can view their details, usage history and leave some notes about the customer.
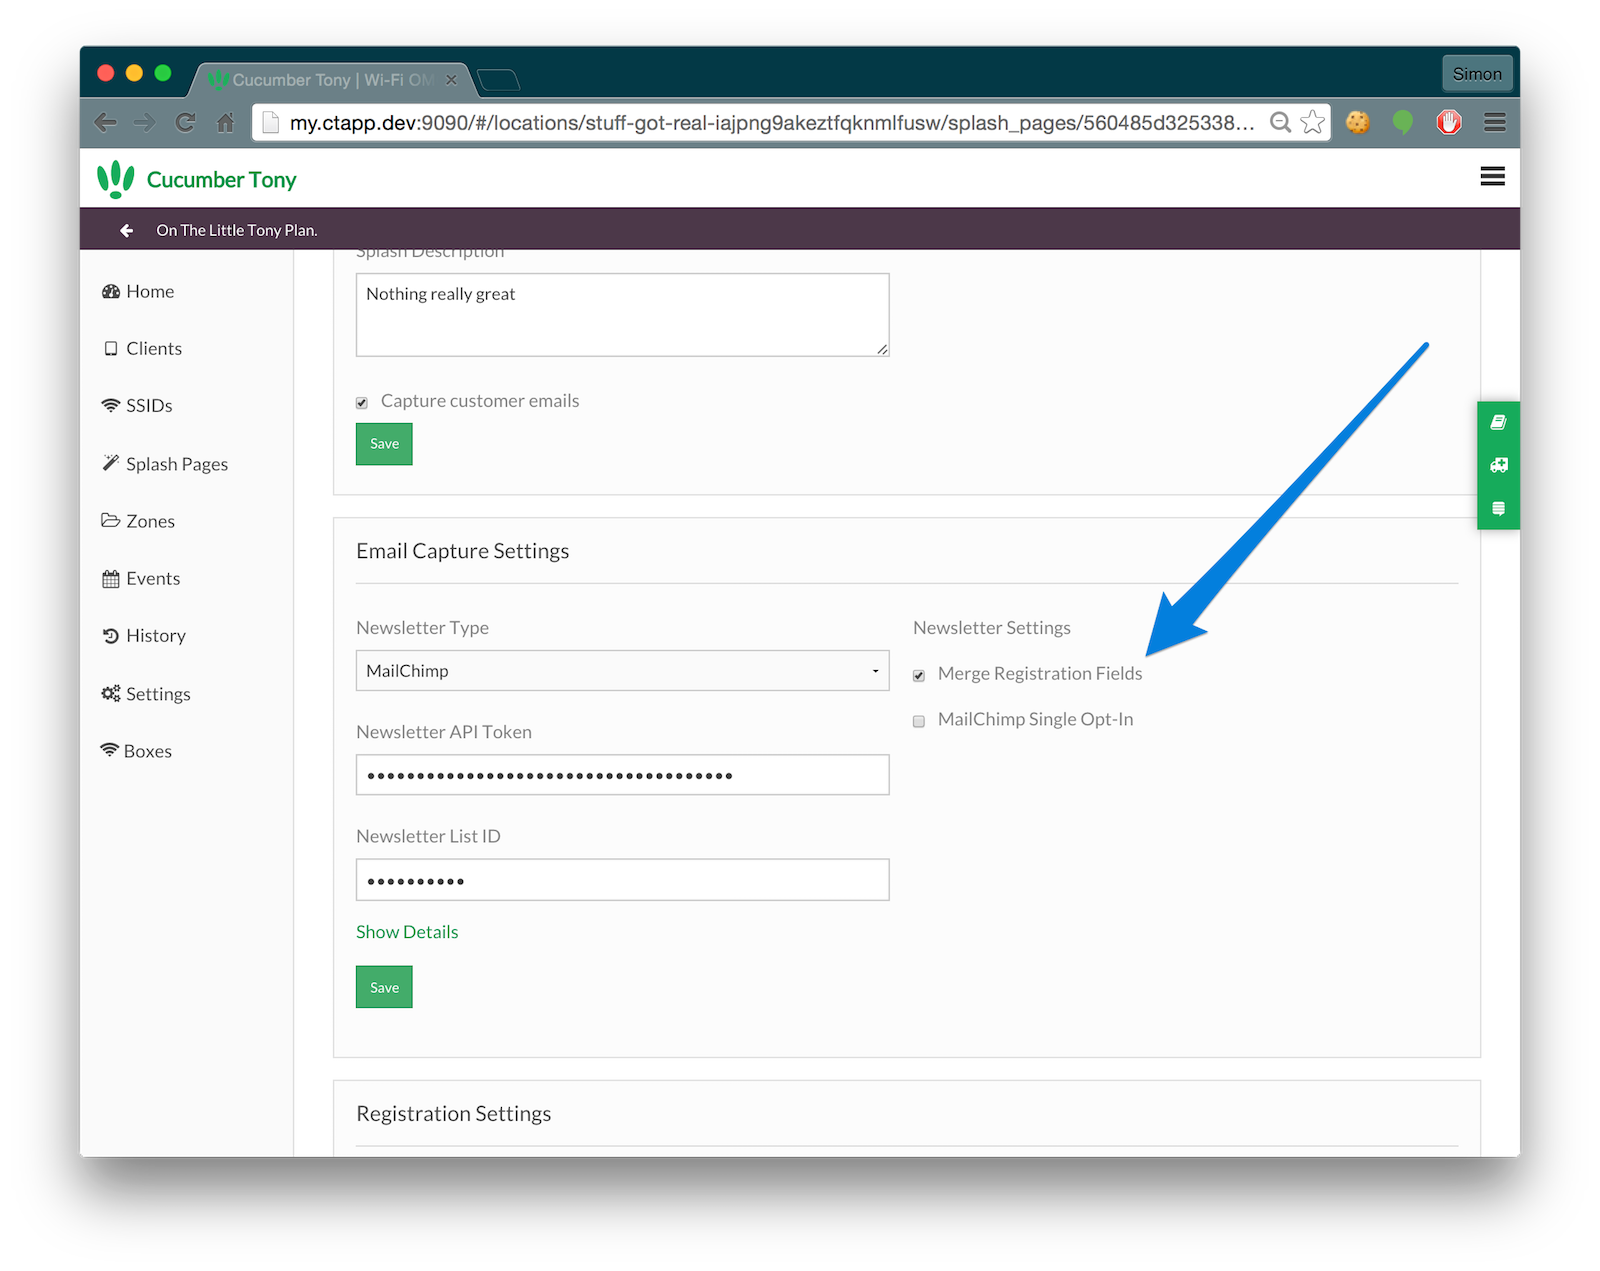
Syncing with MailChimp and Campaign Monitor
To sync your emails with MailChimp, all you need to do is enable the newsletter in your splash page. Emails will automatically be sent to your service.
If you want to sync you custom fields with MailChimp, you need to be on a paid plan. If you’re on a paid plan, please make sure the ‘Merge Fieds’ option is enabled. This only works with MailChimp at the moment.
That’s a Wrap
You should be good to go, let us know if you need assistance with this!
Questions
What if they turn up with a new device.
If you’ve selected “Require Registration”, they will be able to sign-in with their chosen username and password.
If not, they will have to register again. There’s no way for us to tell who they are.
I can’t change the username
That’s correct, the username field cannot be removed. The username is always the email of the customer.
I can only see 25 guests
On the free plan, the number of guests you can view is limited to 25.
I don’t see my custom fields in MailChimp
This option is only available for paid plan. If you’re on a paid plan, first check you have enabled “Merge Registration Fields” in your portal.
If you’re sure you’ve done this, check your field IDs match. Your fields ID are set in MailChimp. Your merge ID must match your Unique ID:
I deleted a field, my data looks wrong.
We recommend you don’t delete fields if you already have data. If you want to change some fields, it’s best to create a new splash page.
Can I export the data
You bet! Simply visit your reports page and hit the download button. You’ll be able to download the data as a CSV. Please note, this is a paid feature.
CT WiFi is a cloud based WiFi management platform for businesses. The firmware gives consumer-grade WiFi access points enterprise-like capabilities.Or you can utlise the captive portal solution with your existing infrastructure. Create a free account and check it here ct-networks.io